Engine Removal and Installation
(For Manual transmissions)
General Hints
While performing any work on the engine, you must disconnect the battery ground strap to avoid electrical mishaps. Disconnecting the battery will prevent 'bad suprises' such as electrical fires, shorts and gasoline explosions.
Installing and removing the engine should always be done by two persons.
The VW 1302 engine is removed from the bottom of the car. To do this the car is lifted one meter (3 ft):
a) The car should be lifted for engine removal. Please make sure that the vehicle is supported in a safe manner, such as on ramps or jack stands. Engine removal is then accomplished with a rolling hydraulic floor jack.
b) The engine is removed while the car is on a hydraulic lift. This method has advantages during engine removal and installation:
1) One does not need a rolling floor jack, 2) the preparative work can be done at a convenient height, 3) the disconnected engine, but still attached to the vehicle, can be lowered onto a suitable support and then pulled. Then the vehicle can be lifted above the engine such that the engine can be removed with little effort, 4) to install the engine the car can be carefully lowered over the waiting engine. Height and side-to-side corrections are easily possible.
Engine Removal
- Disconnect Battery Ground Strap (Minus side) at the battery.
- Remove oil bath air filter.
- Disconnect electrical connections to the generator, coil, carburator and oil pressure sender.
- Remove accelerator cable, by loosening the clamping nut and withdrwaing the cable to through the fan housing to the front of the engine. Remove the cable's sleeve as well. Be careful not to loose the clamping nut.
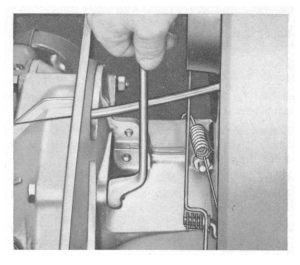
- Unscrew the nuts of the top two engine mounting bolts. The helper will need to hold the bolts. (See Fig. 1)
- Raise vehicle.
- Pull off the gas line and seal it shut with a wooden plug (pencil) or a clamp.
- Disconnect both heater cables from the heat exchangers (stuck threaded fasterners should be sprayed with Liquid Wrench prior to removal).
- Pull accelerator cable from its guide.
- Raise/support engine.
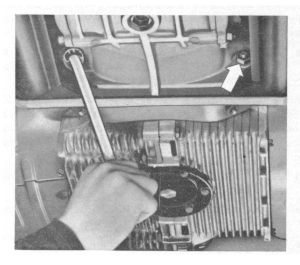
- Unscrew the two lower engine mounting nuts. (See Fig. 2)
- Pull the engine to the rear of the vehivle to clear the main drive shaft of the transmission and raise the car slowly until the engine can be removed from under the car. Conversely, lower the engine slowly until it can be pulled out.
Pay carefull attention to the drive shaft and the clutch plate to avoid damaging them.

Fig. 1

Fig. 2
Engine Installation
Preparation
- Clean transmission's bell housing and engine mating flange, but do not clean the clutch throw out bearing since they are maintenance free.
- Check the throw out bearing for wear and replace if necessary. Roughen up the plastic ring on it slightly with rough sand paper and lubricate lightly with molybdenum-sulfide paste.
- Lightly lubricate the starter bushing with general/multi purpose grease.
- Apply some molybedenum-sulfide powder to the teeth of the trasnmission's drive shaft.
- Center the clutch disc with the gland nut's needle bearing (with an old drive shaft or special tool).
- Put the car in the 1st gear to keep the drive shaft from turning out of position.
Installation
The engine will be lifted into the engine compartment (or the vehicle lowered over the engine) for installation. During this process care must be taken to avoid damaging the drive shaft, clutch pressure plate and clutch throw out bearing.
The mating of the transmission's drive shaft to the gland nut can be made easier if one rotates the crankshaft by turning the generator pulley.
Note: During this, not-so-easy, procedure do not forget to guide the throttle cable through it's guide tube through the fan shroud.
First guide the lower engine mounting studs into the bell housing. Then shift the engine until it's flange is in close contact all around with the transmission case.
- Secure the upper mounting nuts before the lower ones.
- Attach the heater bellows and the heater control cables.
- Re-attach the fuel line.
- Lower the vehicle and re-connect the electricals.
- Connect throttle cable and adjust at full throttle.
- Arrange the engine compartement seals to their proper positions.
- Adjust clutch pedal free play.
- Set timing.